Dr.Fone - Phone Backup & Restore Review
- About the program
- Features of the program
- Using the program
- Step 1: Start Dr.Fone application – Android backup and restore software
- Step 2: Select type of files to backup
- Step 3: Restore the backup on your Android phone
- Step 4: Preview backups and restore files to Android phone
- Frequently Asked Questions
- Comments (1)
Backing up is exactly the process without which, in today's reality, it is impossible to use your phone and other gadgets.
With the help of this backup program, the user gets the opportunity to selectively copy data, which occurs literally with one click of the mouse and a couple of minutes. A preview of the backup is available, and you can restore it to both an Android device and an IOS.
The program is very well developed and tested, therefore it supports more than 8 thousand devices for use. In addition, it can be installed both on a Windows computer and on a Mac computer.
About the program
Dr.Fone review - Android Phone Backup is a simple and logical backup of Android system data. The program makes it easy to back up Android data to computer, and even selectively restore backup data to your Android device.
This program is designed to simplify the backup process. Subsequently, you can use data recovery between your phone or tablet or computer.
The program works according to a fairly simple principle - to start interaction, you just need to connect the device via a reliable cable and start working with one click of the mouse.
One of the advantages of the program is that it supports a large number of files, including contacts, messages stored on the phone, photos, videos, and even application data. Also, with one click of the mouse, you can restore data, the operating system of the device does not play any role at all.
Features of the program
One click of the mouse is enough to start working with the program. It is several times better than classic backup software because it is user-oriented and therefore very easy to use. In order to work with it, you do not need any special skills or knowledge, and this can be considered one of its advantages. The program is so easy to use that the entire backup process takes literally one click.
The whole principle of operation is based on the fact that as soon as the device is connected to the program, it will automatically recognize it and create a backup copy of all data on the computer. It is important to note that it will not overwrite old backups, but will create a new one, which is undoubtedly very convenient.
You can selectively restore a backup. When you start the program, you can view the data that needs to be restored. It is very important to understand that the program works quickly and reliably with any operating systems without any problems. This means that data can be copied from Android device and restored to IOS device.
Using the program
In order to successfully work with the program, the developers offer to follow four simple steps. Let's consider them in more detail.
Step 1: Start Dr.Fone application – Android backup and restore software
At this stage, you need to download the program, install it on your computer and run it. On the main page of the program, select the Phone backup button.
Next, you should connect your device to your computer via a cable. It is important to remember that the cable must be completely fixed, the success of the event depends on it. A special debugging mode must be enabled on the phone. If your device is Android 4.2.2 or higher, in this case a special pop-up window will appear asking you to allow debugging, you must click OK.
Then you need to click on the Backup button to start this process. If the user is not using the program for the first time, and the computer has backups that were created earlier, then the button View backup history is available for him.
Step 2: Select type of files to backup
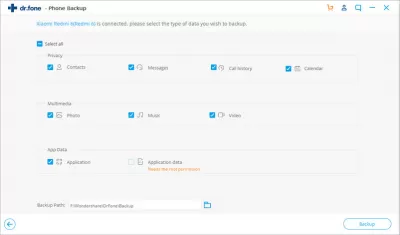
At this stage, the user must select the types of files from which you want to back up. These can be contacts, messages, call history, photos, music and videos.
The backup process itself will not take much time, just a couple of minutes. It is very important to remember that during this process it is better not to disconnect the device from the computer, otherwise everything will have to start over. It is also important to remember not to delete the data that is being backed up.
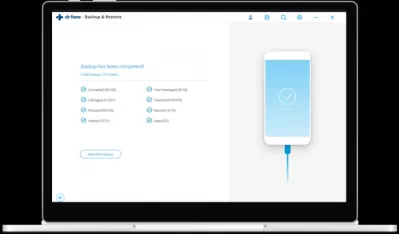
When the copying process is completed, you can click on the View backup button. Thus, you can view the files that were in the backup.
Step 3: Restore the backup on your Android phone
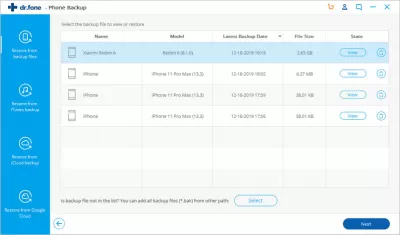
At this stage, you can restore the backup to your Android device. To do this, just connect it to the computer via a working cable, and click on the Restore button. The program will very quickly show all the backup files that were created earlier. The user only has to select the desired file and click on the View button.
Step 4: Preview backups and restore files to Android phone
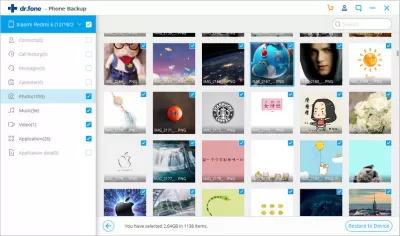
At this stage, there is a preview and the actual recovery of files from the backup. The user can view and select the necessary files and click on the Restore button to the Android device.
The recovery process itself will take just a couple of minutes, and during it you should not disconnect the device from the computer.
Users highly appreciate the work with this program, as it is easy to use and does an excellent job of its functions.
Frequently Asked Questions
- Does Dr.Fone - Phone Backup & Restore offer selective backup and restore options?
- Yes, Dr.Fone - Phone Backup & Restore allows for selective backup and restore, giving users the flexibility to choose specific data types they want to backup or restore. This feature is convenient for managing storage space and focusing on essential data.


